
Send to Email Action
The basics
Section titled “The basics”The “send to email” action lets you send an email containing static information and attribute values. This is useful to notify a party that an interaction with the chatbot has occurred and to share the details.
What you’ll need
Section titled “What you’ll need”All you need to set this up is an email address to send the email to. Note that the action only sends to a single email address.
Where to find
Section titled “Where to find”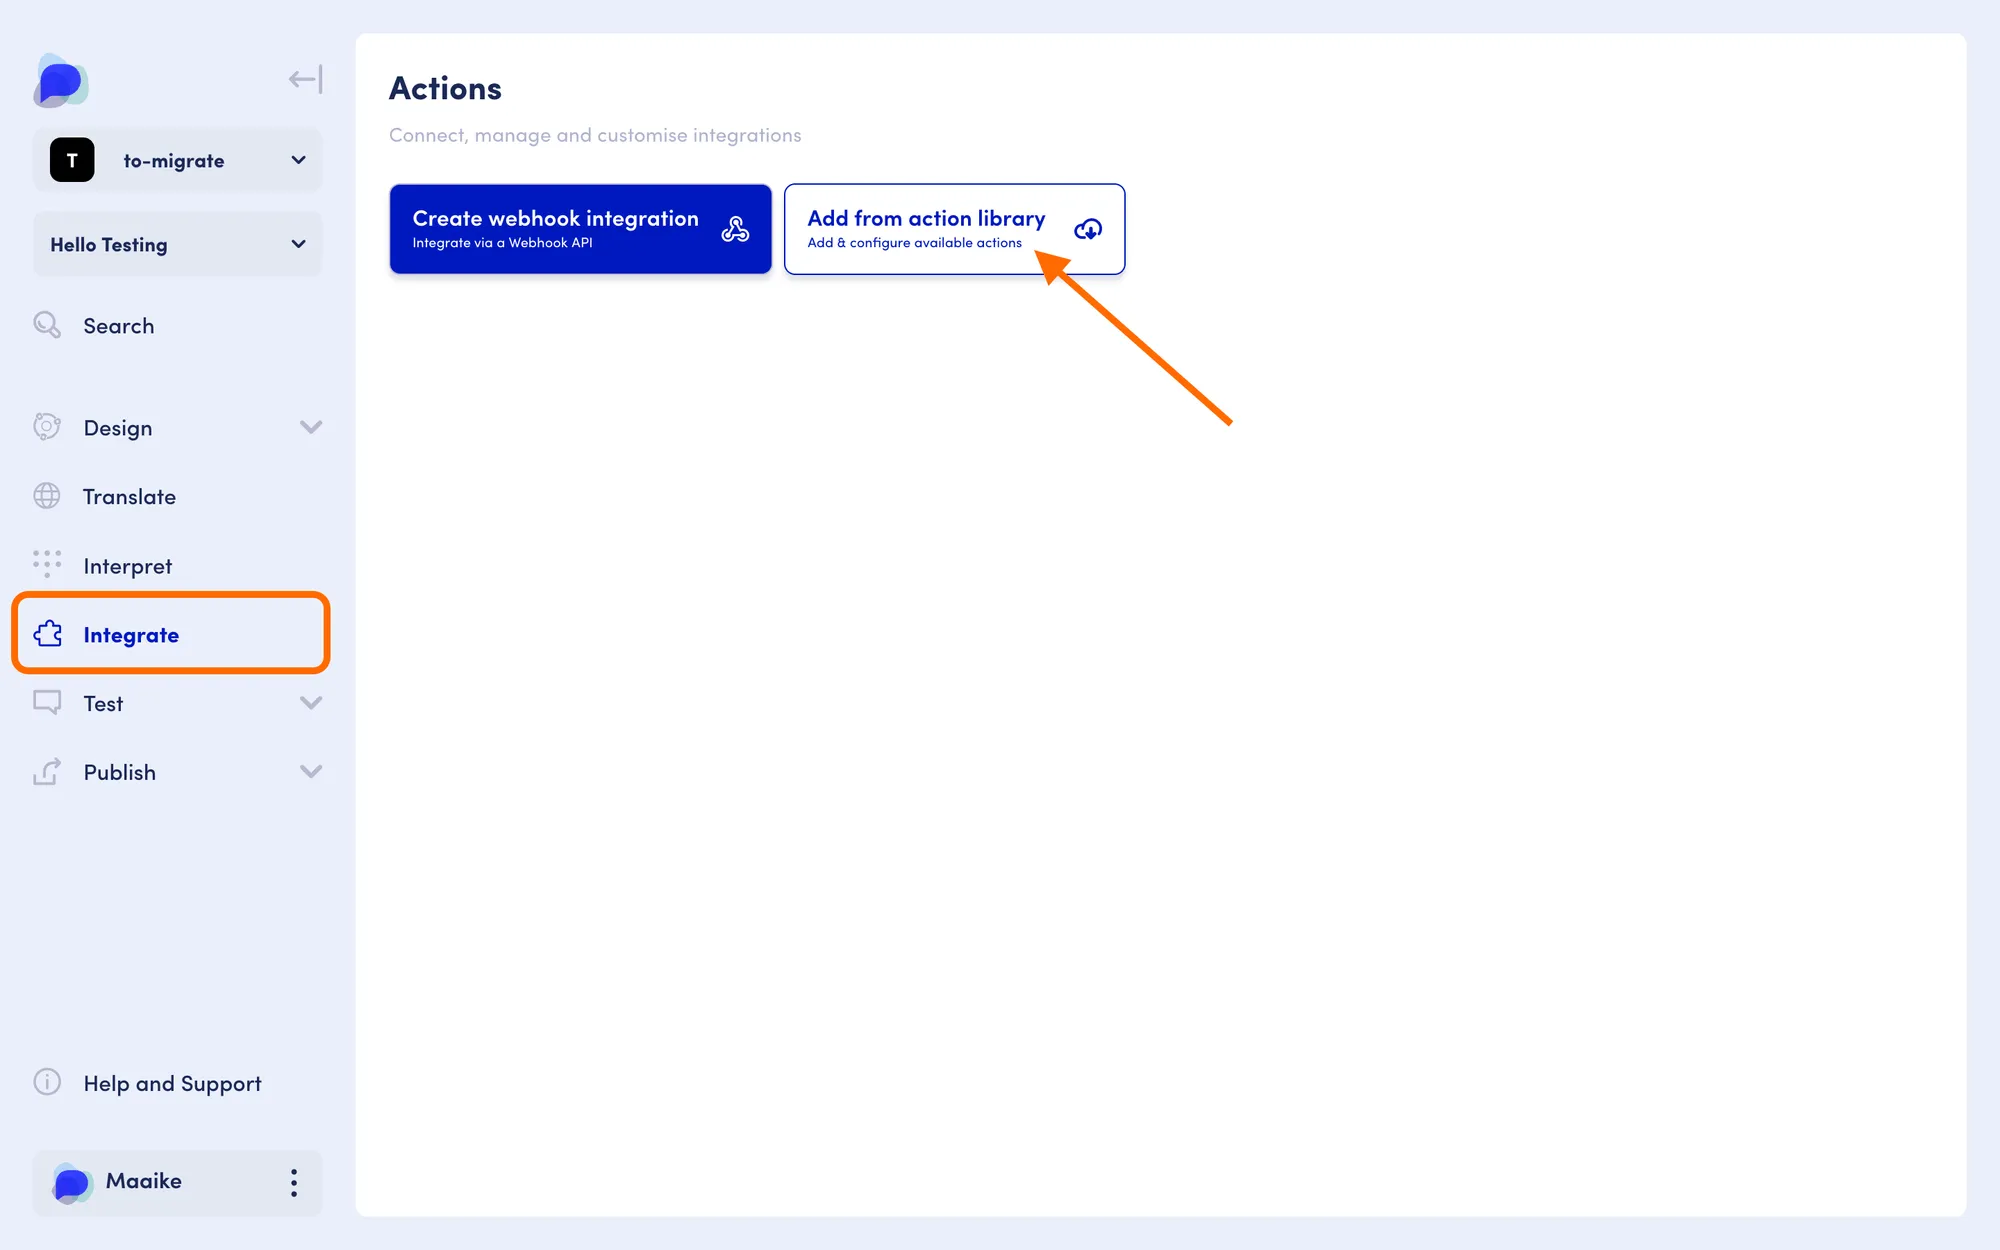
To set up the send to email action for a given scenario in your workspace:
Go to your Workspace overview, select Manage Scenarios (Scenarios)
On the scenario overview, select the scenario for which you would like to add a send to email action.
Use the left-hand menu and click on the Integrate menu item.
Use the ‘Add action from library’ button.
Structure
Section titled “Structure”Once you click on “Add from action library”, give the action a name of your choice.
Select “Send to Email”.
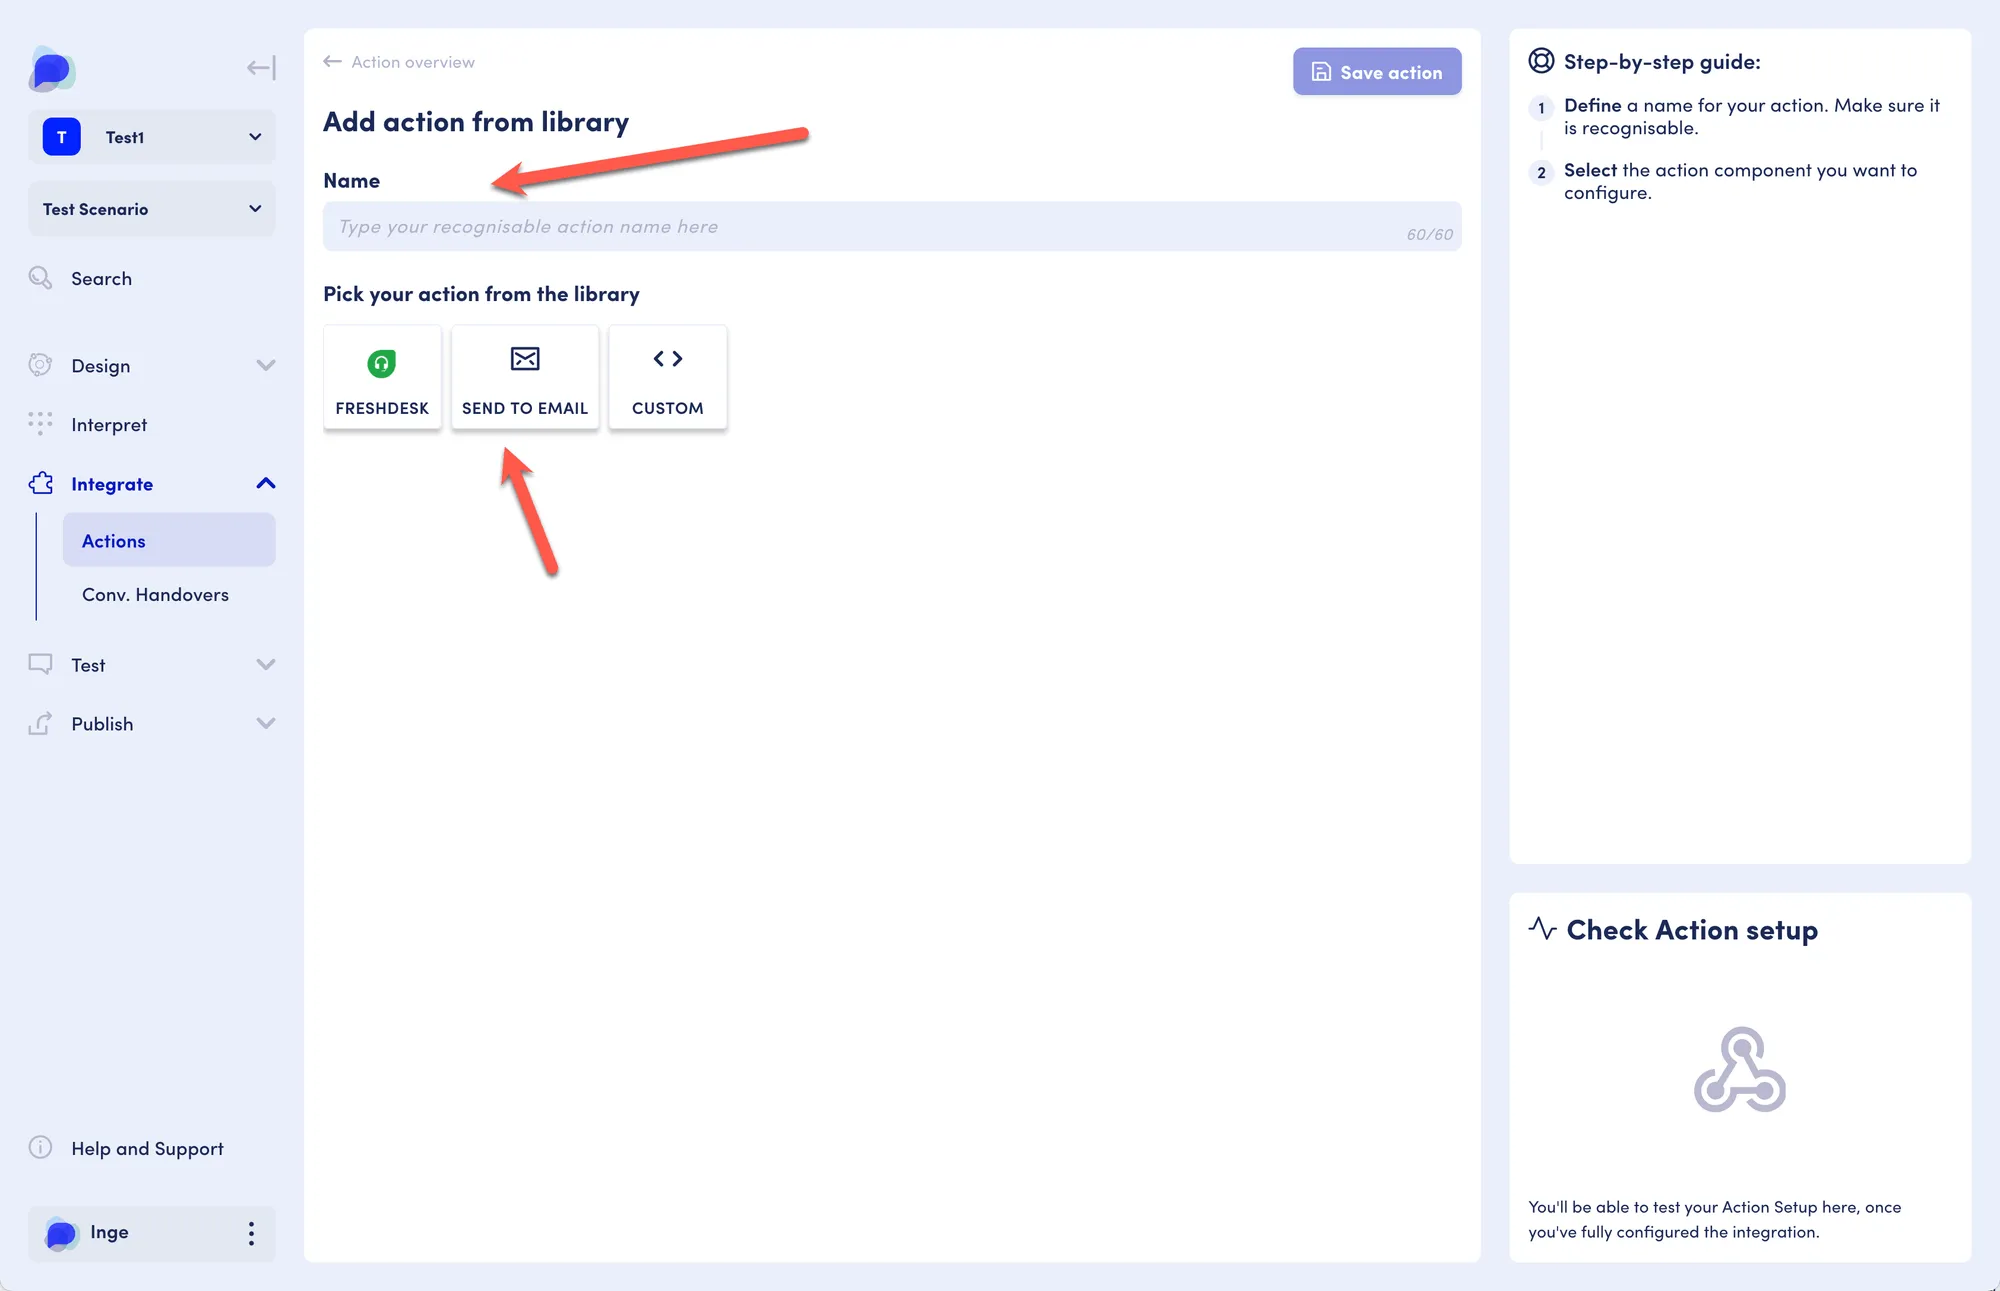
Add an email address, subject line and body.
You can use attributes in your message. Do make sure these attributes have values, e.g. you can set attribute values in buttons, or attribute values may be passed on through integrations. For more on attributes and values, visit the Contexts and attributes section.
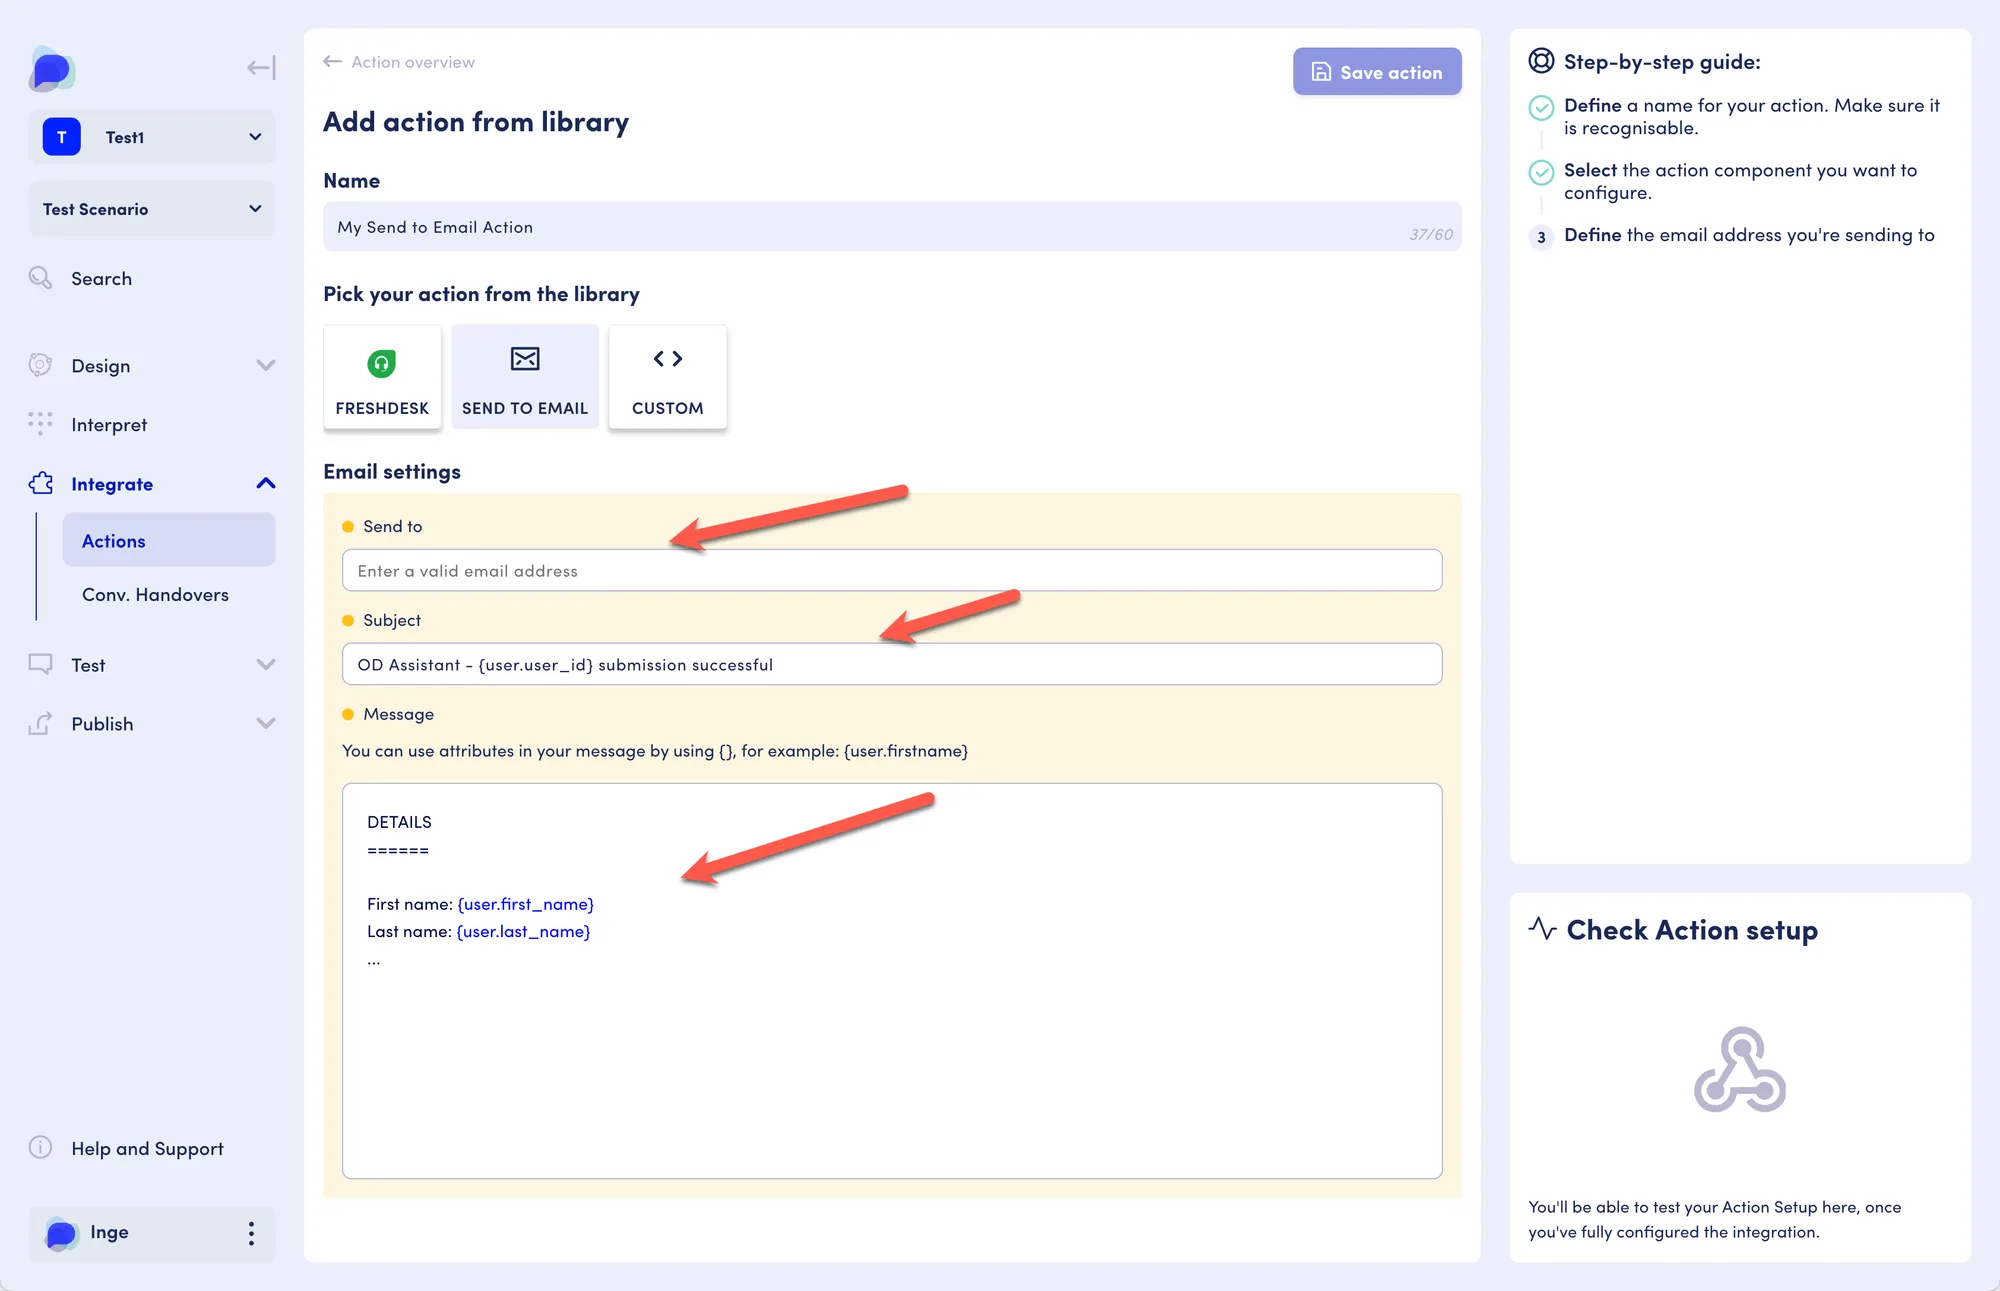
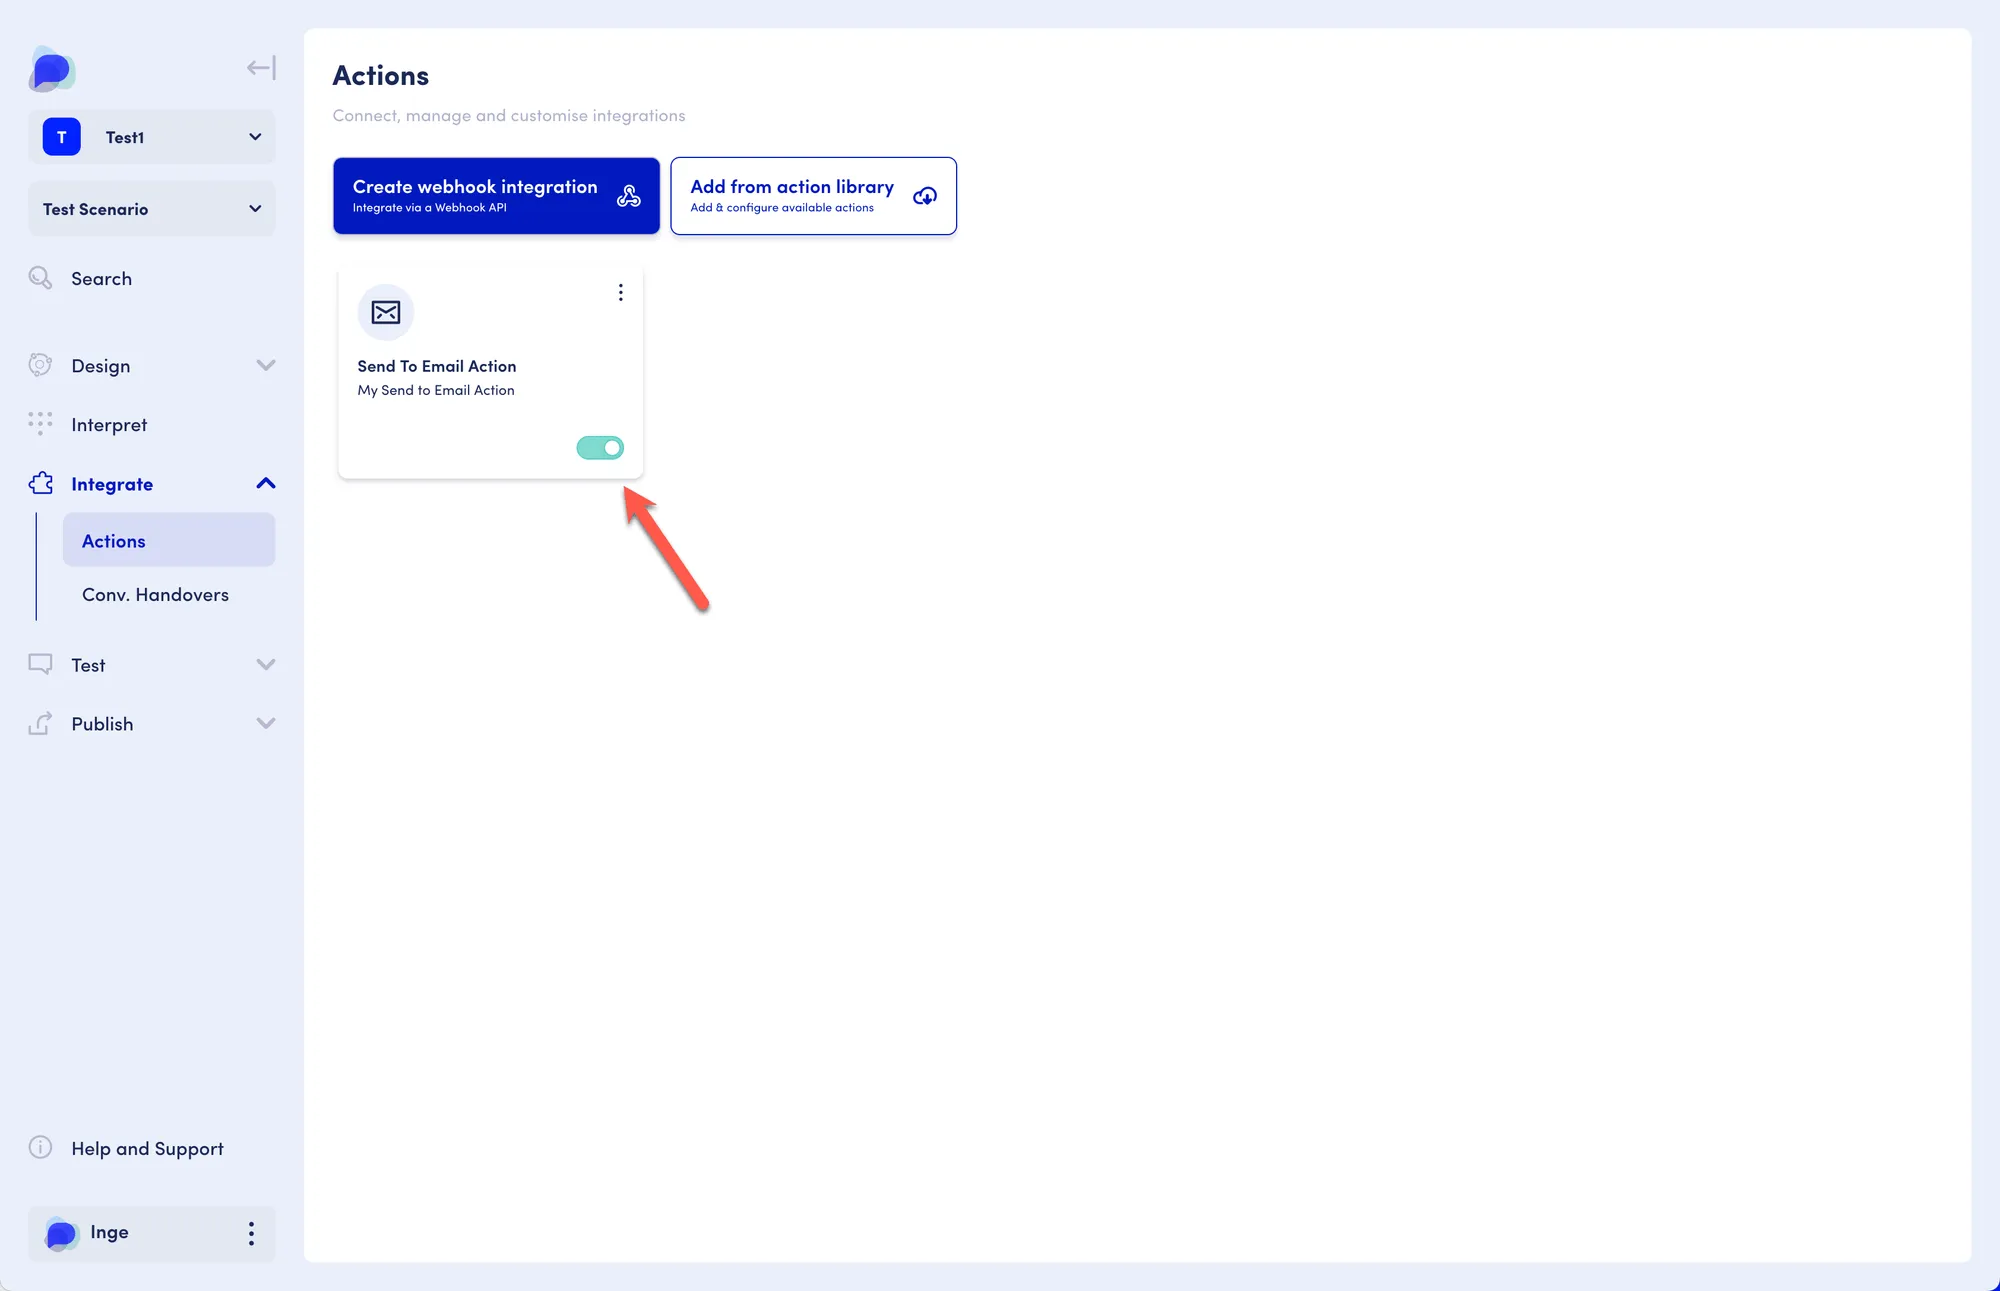
Save the action.
Activate the action.
Using the action
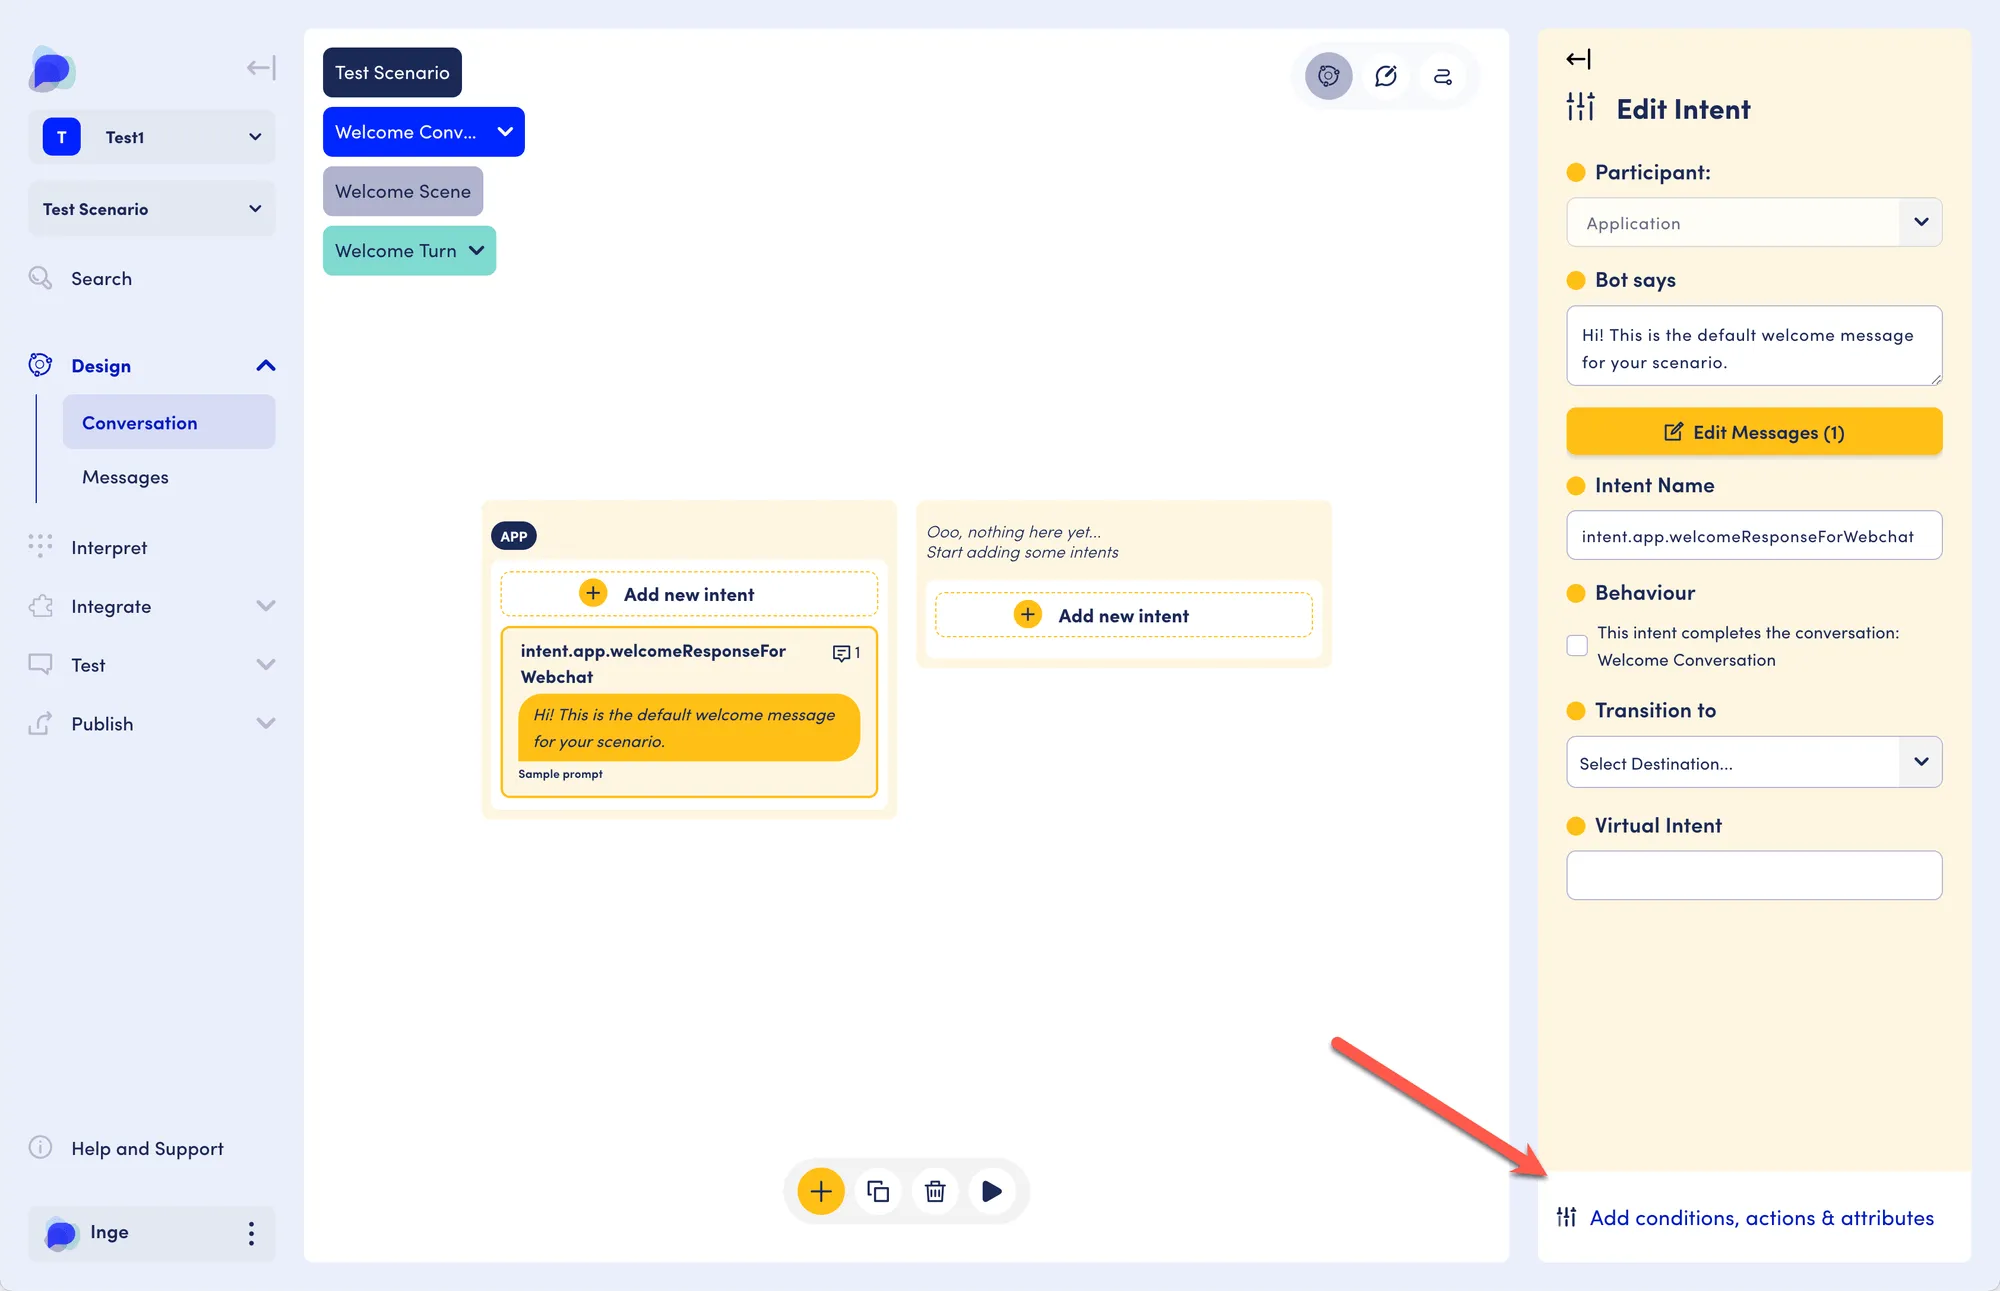
Section titled “Using the action”In the designer, go to the intent that you want to action to be triggered from.
Click on “Add .. actions, …” at the bottom of the component pane.
Select the action from the dropdown.
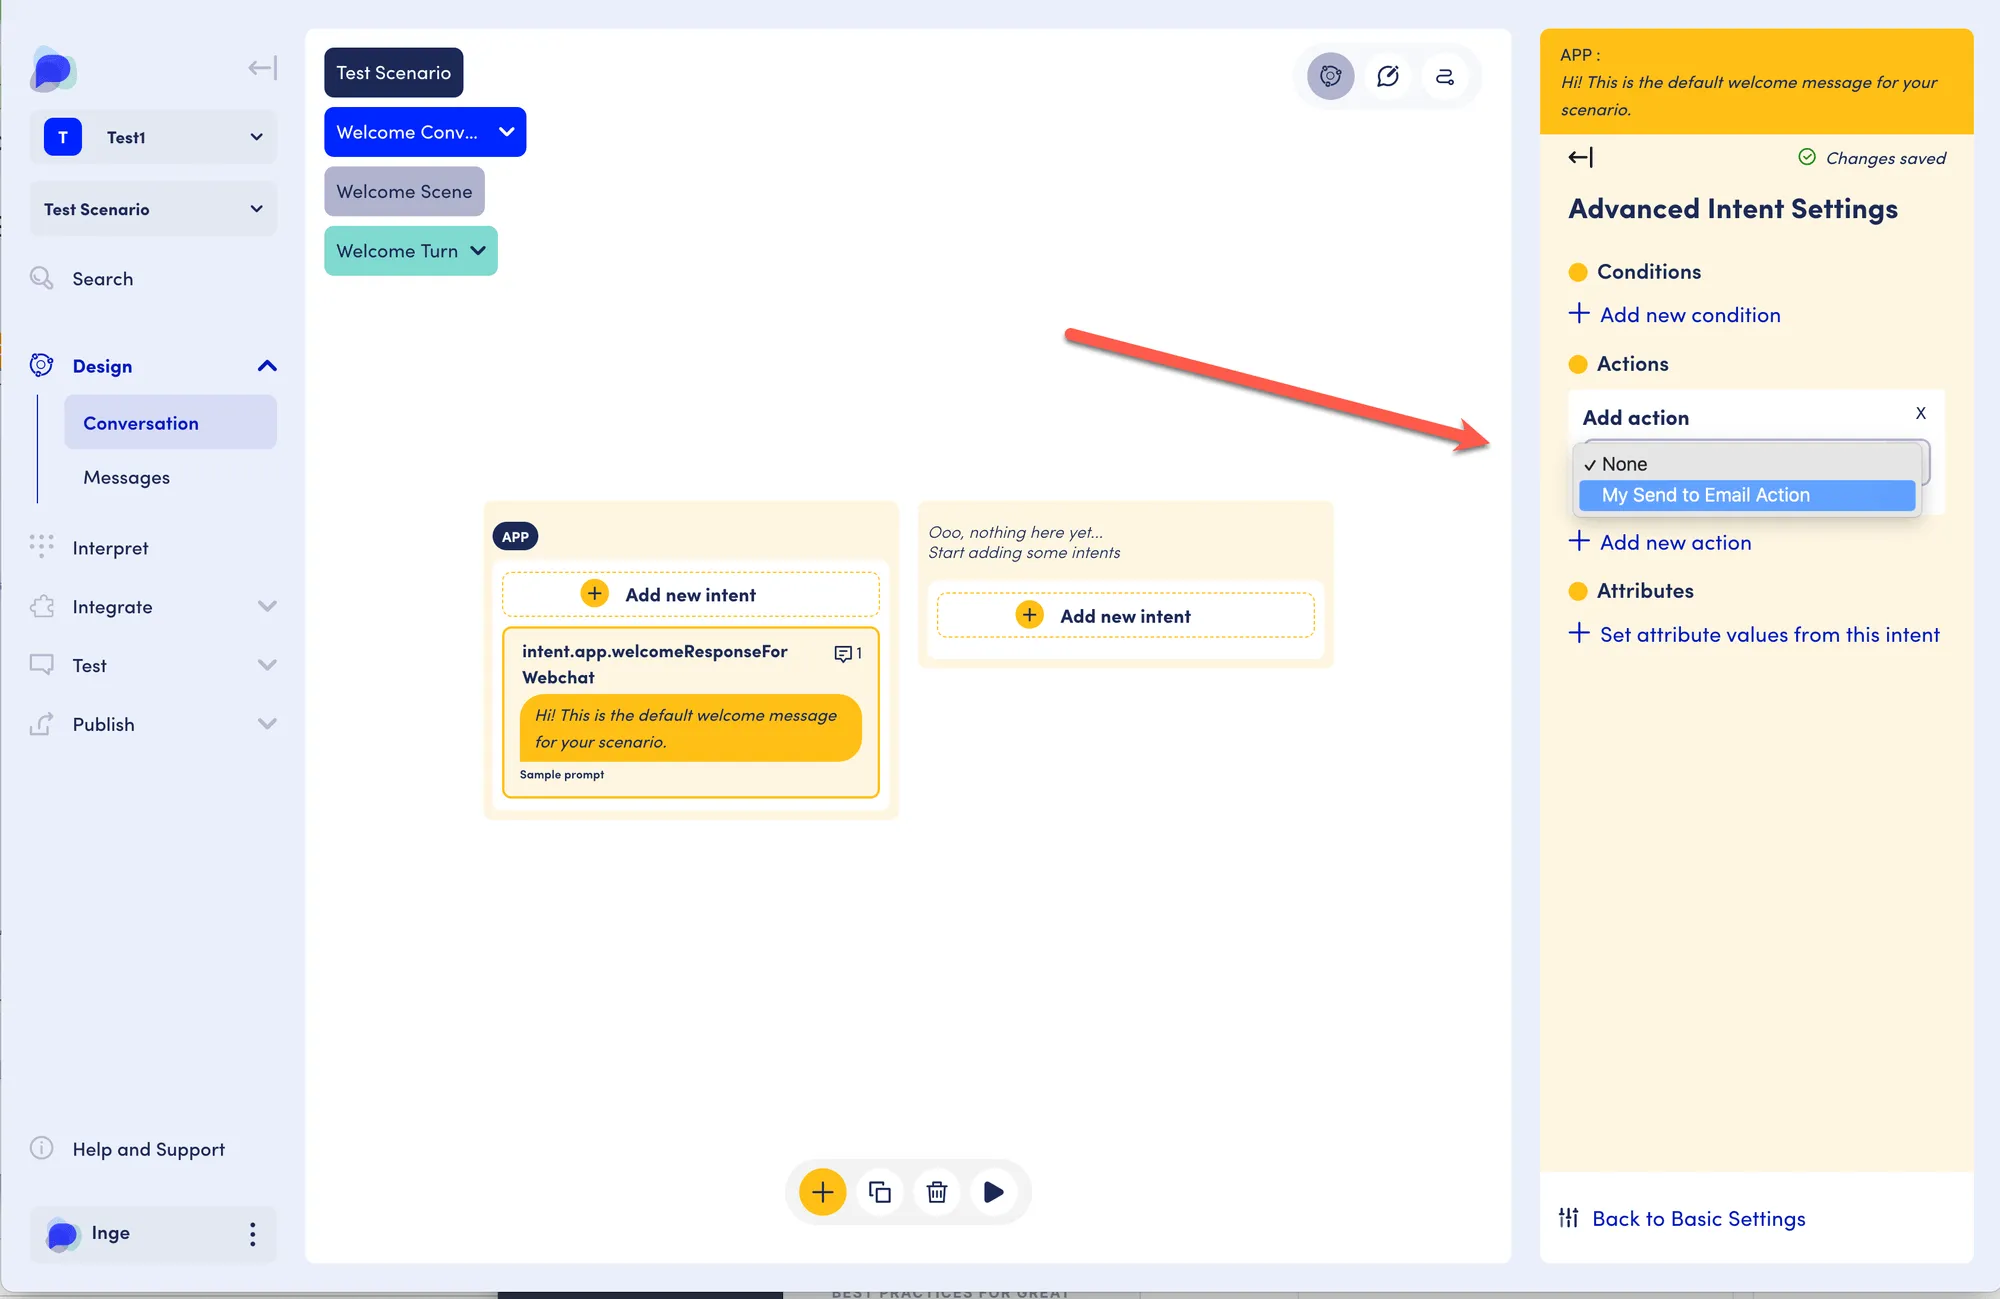
The action is now functional. Test it by using the preview. The email will be sent to the email address you specified.